We may receive a commission when you use our affiliate links. However, this does not impact our recommendations.
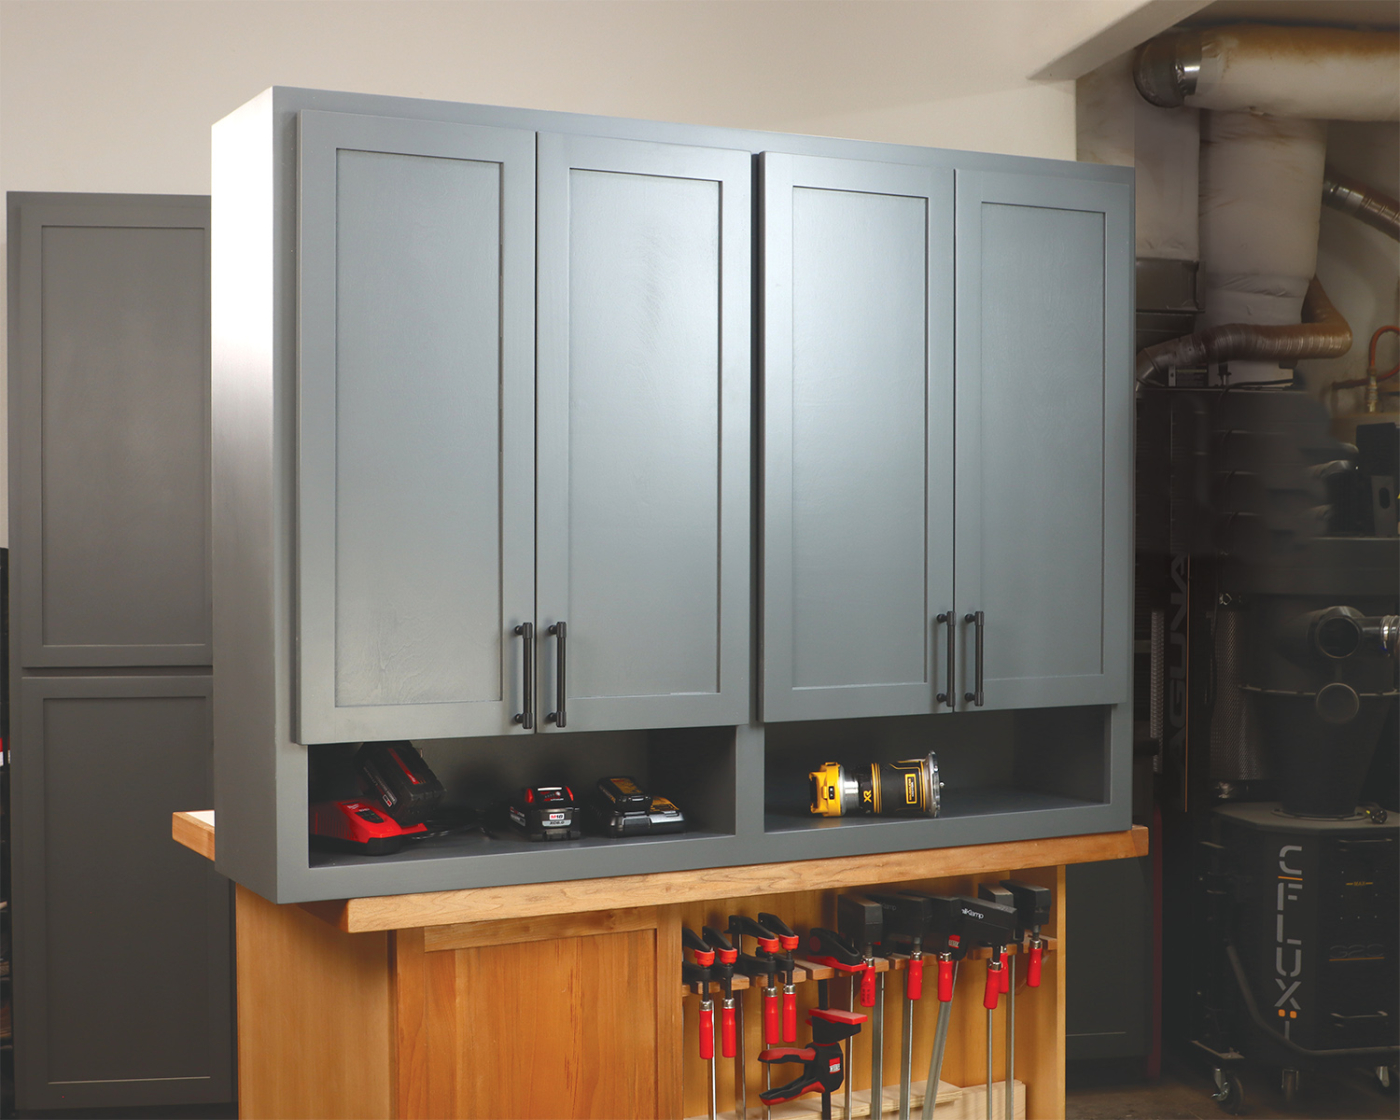
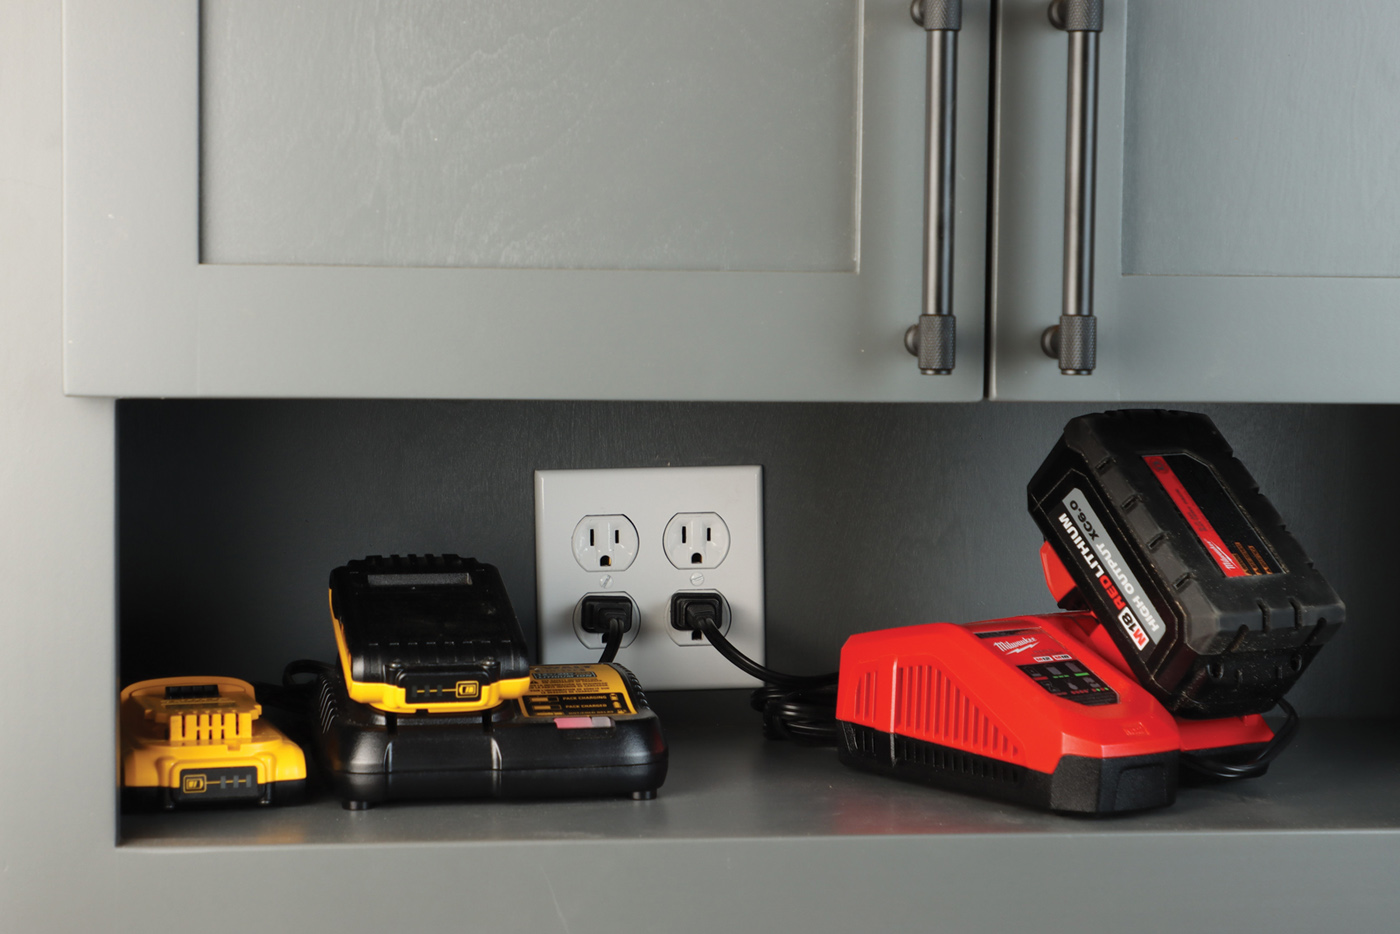
Build the perfect place to store and charge your growing collection of batteries and cordless tools.
Cabinet making is a great skill to have, and once you successfully tackle your first cabinet, you’ll have confidence to make another. Plus, you can customize the size and features for your specific needs and make them strong enough to handle the rigors of shop life. With so many cordless tools available, it’s nice to have a dedicated charging station for all those batteries. This is especially true if you own multiple brands and platforms of cordless tools. Throw in some yard tools and an eBike, and the batteries can overrun your shop, so let’s get started on a handy cabinet built to house all those accessories.
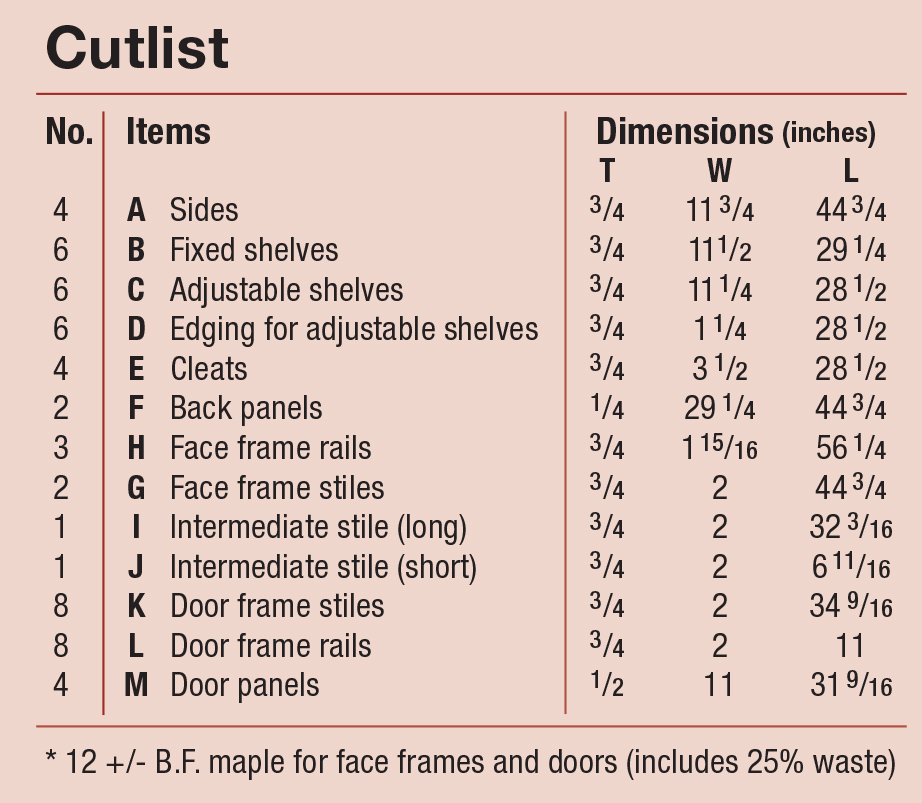
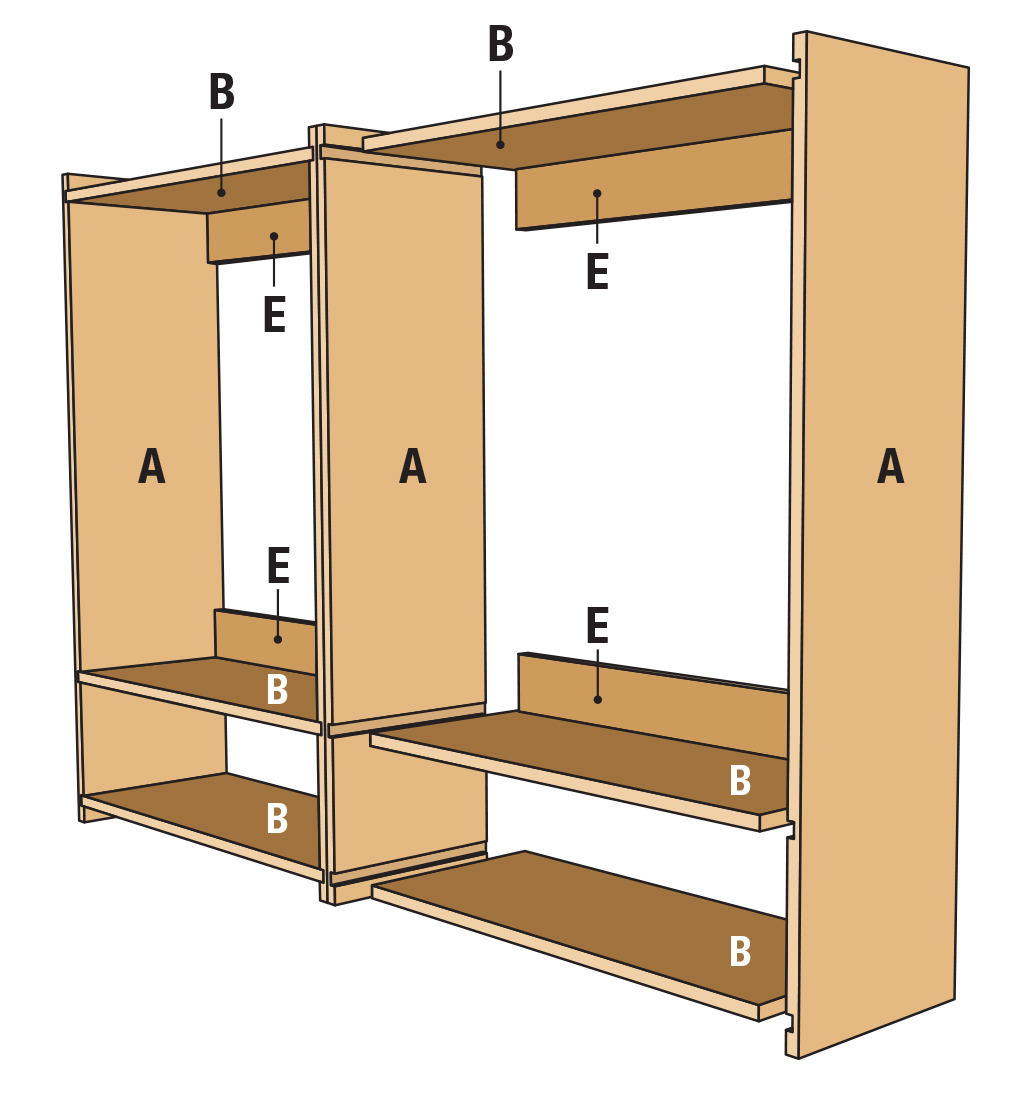
 One of the main challenges in cabinet building is breaking down full sheets of plywood. Make sure to have some featherboards and plenty of outfeed support to control the panels. Often, I’ll break panels down with a track saw or cordless circular saw, before taking more manageable pieces to the table saw. Size the plywood panels according to the materials list, starting with the side panels and fixed shelves. Since we’re basically building two 30“ cabinets ganged together, you’ll need 4 side panels. Normally wall cabinets have only 2 fixed shelves per unit, but due to the addition of the open charging cubbies, this wall unit uses 3 fixed shelves per unit, for a total of 6.
More to make: Read Willy’s article on shaker shop cabinets to match this charging station.
In our store: Purchase video plans from Chad Stantion to build a stacking tool caddy.
Fill your cabinet: See our favorite 12V drills.
Online extra: Check out the SketchUp model of the charging station.