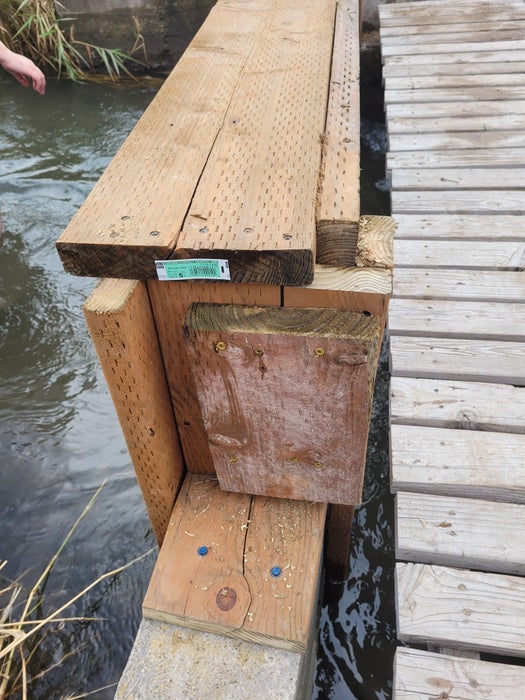
Drill First wood plank into top of cement surface. This will serve as the base for the structure
Drill Side wood plank into cement and First (on top of cement) wood plank.
Screw Vertical Plank into Side plank: The Exact height of this plank is critical. It determines the mounting height of the trailer jack. Make Sure that when the jack is fully extended the wall reaches the desired level.
Follow the same steps on the other side of the water.
If any planks split during installation add reinforcement planks to ensure stability.
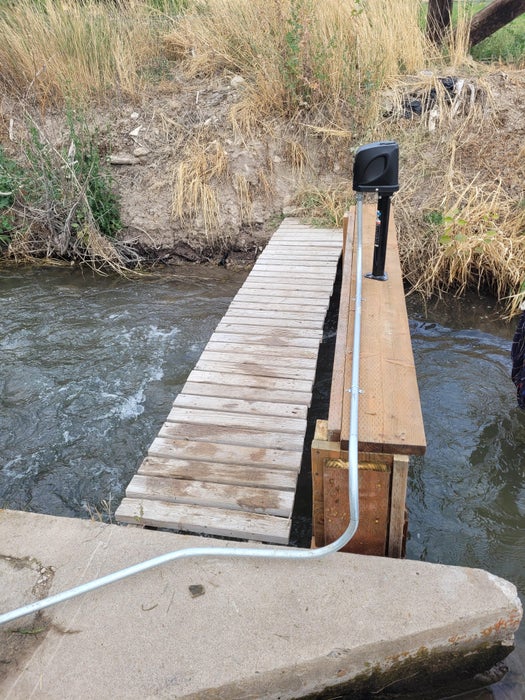
Screw a top plank ( we used a 2×10) into the vertical planks, spanning across the water. We let our board hang over the other wood to position the trailer jack in the correct position.
Attach an additional perpendicular plank to the top plank to add rigidity and prevent bowing.
Step 2: Trailer Jack and Wall
Remove the bottom foot of the trailer jack. Weld square tubing onto the foot. Square tubing should span most of the dam wall.
Drill bolt holes in the welded Square tube for bolts to attach dam wall.
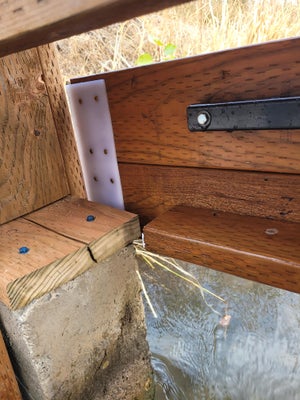
Screw short planks perpendicular to long planks connecting them to form the dam wall (we used 2 separate planks to create the full height of the dam wall). Attach plastic cutting boards to any face that will be in contact with cement to prevent binding.
Drill corresponding holes in the dam wall and bolt it securely to the trailer jack foot (square tube).
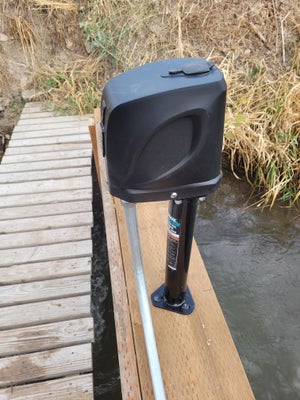
Drill a 2.5in hole for the trailer jack in the desired location on the top plank.
Place the trailer jack in the previously made hole and drill holes for the bolts that match the pattern on the trailer jack. (the trailer jack needs to have the bottom foot removed during this step)
Once the jack is bolted in place, reattach the modified bottom foot to the trailer jack.
Step 3: Conduit
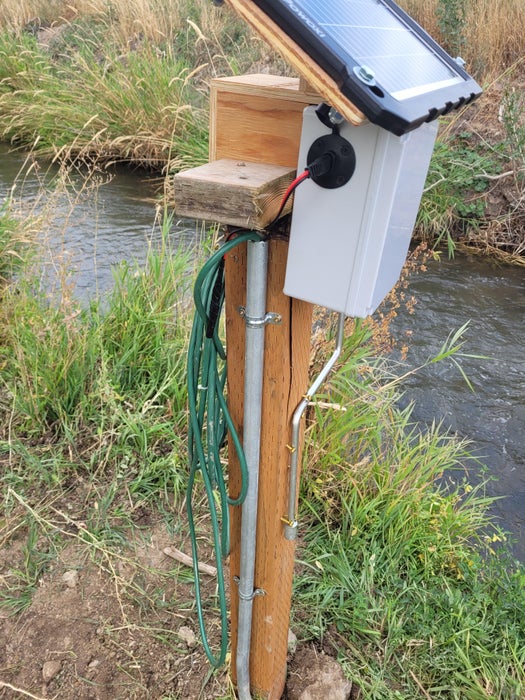
Bend electrical conduit and attach it to a nearby wooden post that will hold the electrical switch, battery, and solar panel.
This step may not be necessary depending on your setup and the weight of the extension cord. However, in this project, the conduit was added to provide extra support and help secure the cord in place.
Step 4: Electrical Box
MODIFYING THE TRAILER JACK
Remove the Phillips screws on the trailer jack cover to expose the wires inside
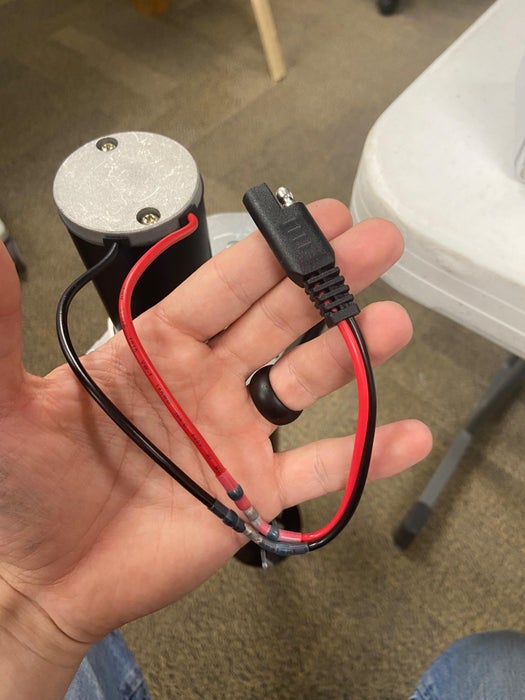
Cut the wires leading to the motor and wire a plug (we used a 2-way flat wire connector) onto both sides of the cut wires
Remove the built in Switch from the Trailer jack
Wire an extension cord with plugs that match the plug leading to the trailer jack motor. this allows external power from a battery.
WIRING THE ELECTRICAL BOX
Wire Solar Panel to any 12v battery that fits in the box
Connect the battery as the power supply for the removed trailer jack electronics
Plug the up/down Switch into the modified extension cord to control the jack.
Drill holes in Electrical Enclosure (we used a grey outdoor electrical box) as needed to route the wires from the solar panel and extension cord into the Box
you can choose to keep or remove the auxiliary light on the trailer jack. In our build, the light was left in place (shown in images)
Step 5: Mounting Box on Post
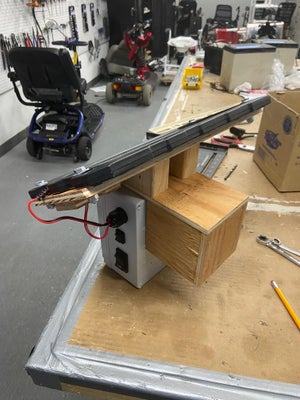
Having the solar panel at an angle allows water to run off more easily.
Create a wood box on the back of the electrical enclosure sized so it will fit over the wooden post. This allows all of the electrical components to be taken off and stored if needed.
Secure the electrical enclosure to a wooden frame that also supports the angled solar panel.
mount the extra trailer jack handle on the wooden post. The extra handle is used to manually operate the trailer jack in the event that the electrical system fails.
