
Recently, I moved to a new house which, alongside many other things, had a tree, which I noticed housed quite a few birds and squirrels. As a person who loves everything nature-related, I grew infatuated with sitting in my patio and watching these critters go about their daily routine.
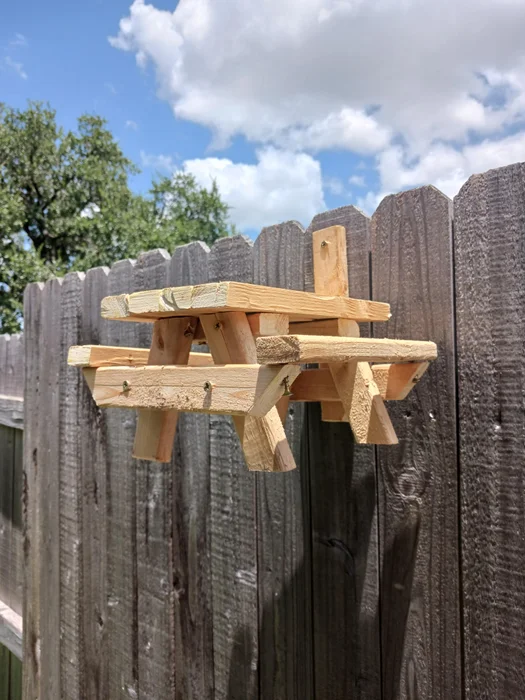
This was my main motivation behind trying to make something that I can use to feed squirrels in my backyard. I had also seen a squirrel bench in a nearby hardware store, which gave me the idea to replicate it. Another motive I had was being able to attach this feeder onto a fence right outside a window in front of my desk so I could see it from the comfort of my workplace.
To make my vision a reality, I 3D modeled the bench first and then went about cutting and screwing pieces together to make a squirrel feeder even a child could make (with adult supervision, of course).
(Sorry for the scuffed images.)
Supplies


Materials
- 1.5 x 0.75 inch wood beams (~120 inches in length)
- 1.5 inch Wood screws
Tools
- Impact driver / Drill (In some cases, a screwdriver might work)
- Hacksaw (or other means of cutting wood)
- Ruler/Measuring tape
- Protractor
For attachment (Pick one):
To hang bench: Any type of twine – Size depending on your choice of hanging depth
To attach bench onto tree, fence, etc.: 1.5 x 0.75 x 6 inch wood beam, screws
Note: The wood beams I had were bought from Home Depot for a previous project and the wood screws I had were from a dollar store. You don’t have to spend lavishly on these materials for a good result.
Step 1: Sketch Pieces Onto Wood


Use a ruler, a protractor, and a pencil to sketch the pieces onto the wood. Make sure to make the lines visible and complete, so as to avoid any mistakes that could be made in the next step
Step 2: Cut Pieces


Use a hacksaw or other wood-cutting tool to cut the wood into smaller pieces as on the cut list. I found it easier to make small dents in the wood that I could use to guide my sawing. This lets you fix the angle that you cut a piece before you go through with it (as seen in the image above).
TIP: If using a hacksaw or something similar, try to use the entire blade for every “swing” that you do. This ensures that the wood is cut fast and that the blade is not intensively dullened on one spot or area (ensuring blade longevity).
Step 3: Assemble Table Top


The tabletop is made from four out of the six 10-inch pieces.
Start by picking a side of the pieces that you would like to act as a surface. Ideally, the surface should be smooth and have the least amount of holes or other imperfections.
Draw two lines 2 inches away from the short edges of the tabletop. These will be guiding lines for the next step.