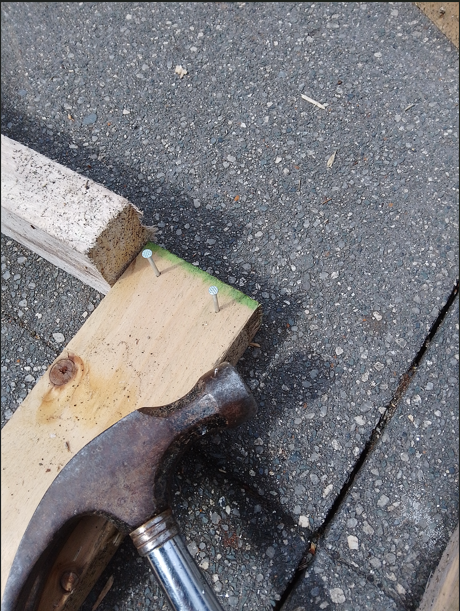
Step 1: Dismantle the Pallets
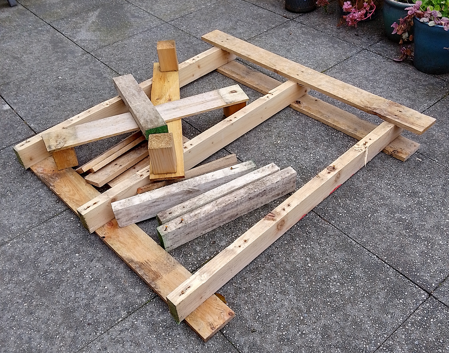


This stage will require the use of a claw hammer and large flat nosed plyers. Wear impact resistant safety glasses, gloves and a dust mask. Carefully use the hammer to loosen the deck boards and stringers from the bearers, when they are lose use the claw to separate them from the bearers with care to ensure they do not split. Use the hammers claw and plyers to remove the nails from the pallets, The plyers can be used to remove the nails that the hammer can not. Tackle one pallet at a time. This project used approximately 4 pallets however you may need more or less depending on the kind of pallet you use. Please not that you may need to change the design slightly depending on the size of wood found in your pallets.
You will need approximately:
4 pallets, that can be dismantled to produce: 112 Nails, 29 planks 1000(mm) long measuring 85 by 12(mm), 9 x stringers 1000(mm) long measuring 35 by 63.5 (mm).
Step 2: Mark Out the Wood
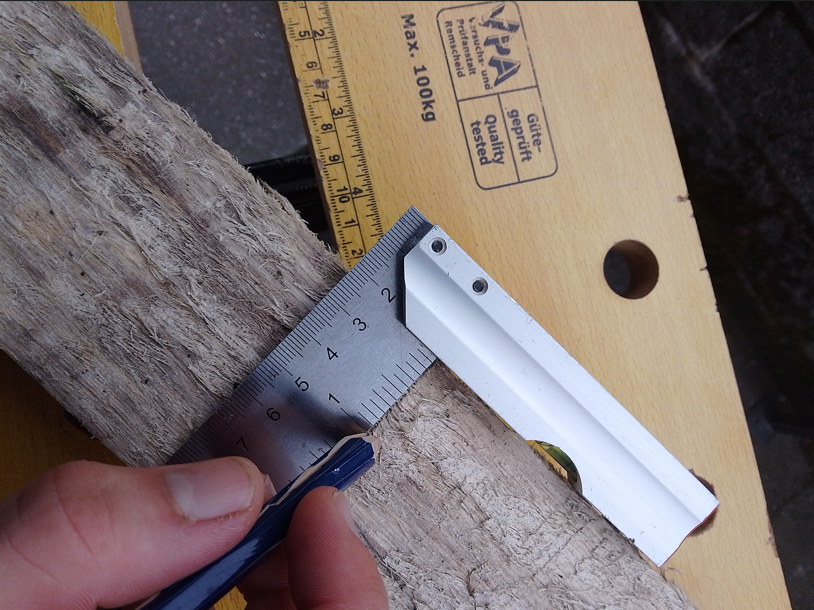
For this step you will need a tape measure, tri square and steel square. Wear safety gloves. Carefully use the tape measure to measure the wood to the correct lengths, then use the tri square and pencil to indicate where to cut the wood, label the pieces with there name and dimension and indicate what parts are offcuts. Take care when marking out angled sections. For the dimensions please see the cutting list as follows:
Cutting List:
- 4 X 1000 (mm) long planks,
- 2 X 875 (mm) long planks.
- 5 X 295 (mm) long planks.
- 2 X 350 (mm) long planks.
- 16 X 1000 (mm) long stringers.
- 13 X 590 (mm) long stringers.
Step 3: Cut the Wood
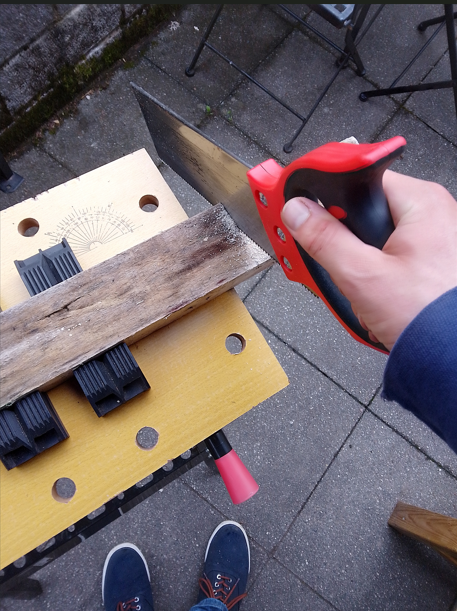
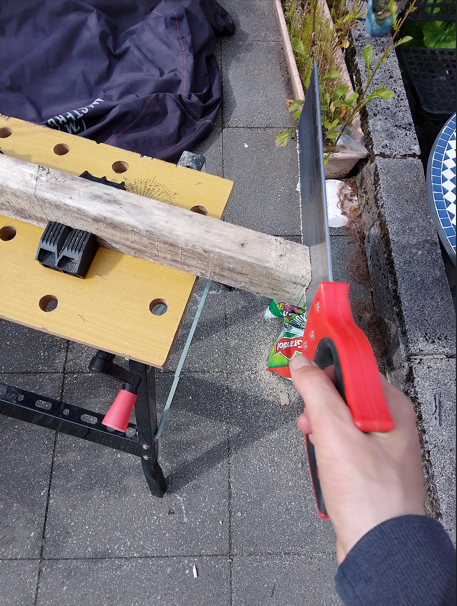
For this stage you will need a portable workbench (or similar), tenon saw, rip saw, vice or clamps. You should wear safety glasses, gloves and a dust mask. Securely fasten the wood to the workbench then cut along the marked lines using the tenon saw, is the wood is to thick for the tenon saw use the rip saw. Securely store all the cut wood and sweep up the sawdust and store separately with the scrap wood.
Step 4: Construct the Base and Side Panels


For this stage you will need a claw hammer and nails, you should wear impact resistant safety glasses, gloves and a dust mask. Use the hammer to tap the nails into the battens in the position indicated on the plans, net place the wood on the ground with the nails horizontal to the ground next place the shorter batten next to the batten with the nails, securing it with your feet gently tap in the nails with the hammer to secure the corner, repeat for the next three corners before securing the middle batten. Next nail the decking boards on to the top of the base frame.
The side panels are constructed in the same fashion as the base.
Step 5: Assemble the Frame
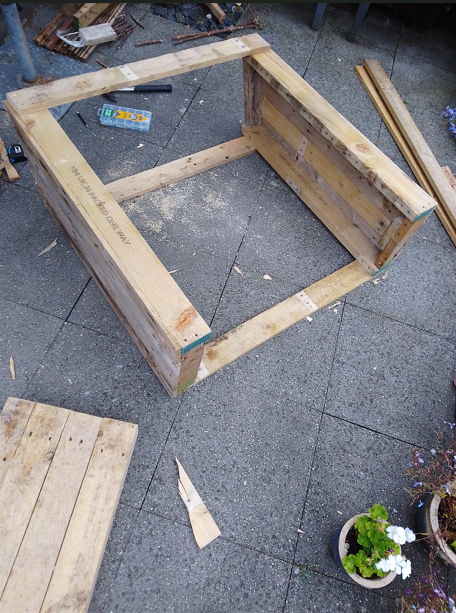


For this stage you will need a hammer and should wear impact resistant safety glasses, gloves and a dust mask. Gently nail the horizontal boards to the side panels, then nail the side panels to the base.
Step 6: Construct the Roof
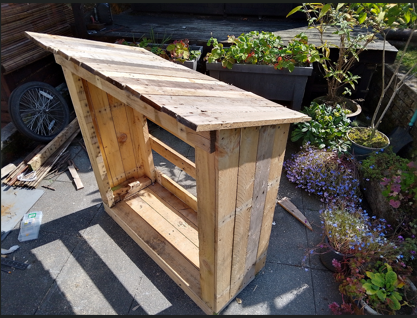


For this stage you will need a hammer, measuring tape, chalk, steel square and a Stanley knife. Wear gloves, dust mask and impact resistant safety glasses. Carefully nail the roof planks onto the roof, going through both the side panels and the horizontal planks.
Next mark out the felt to the correct dimensions using the tape measure, steel square and chalk. The felt can then be cut to shape using the Stanley knife. Carefully nail the felt to the underside roof using the hammer and clout nails until it is secured.
Step 7: Site in Final Location


Carefully position the Firewood Store in its final location preferably in a sheltered place on level ground, place it on top of 4 blocks with one under each corner to help prevent exposure to damp and rotting. Ensure that the ground is level, if not level it or place small squares of wood under each corner to ensure that the Firewood store is level and does not tip over.
Please enjoy using this Firewood Shelter!